With both the altitude and azimuth axes modified, I started to put the telescope together. The azimuth axis was first. I reassembled the ETX fork arms, attached the stiffener disk to
the base and attached the base to the aluminum azimuth box. The base could now swing freely on the azimuth axle bolt.
I attached the azimuth gear head and right away noticed that the metal axle bolt was rubbing against the plastic of the gear head mount. I don't know if
this is intentional (a form of Meade friction clutch?) but I wasn't going to put up with it. Using some sandpaper, I enlarged the hole in the gear
head until the bolt could go through without touching. I wonder if this friction fit is causing the excess current drain seen in some Meade DS systems.
Once the gear, washers and clutch knob were installed, I hooked up the azimuth motor, power supply and handpad and tested the azimuth axis. It worked!
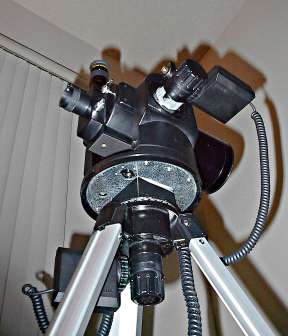
The picture to the right shows the ETX base stiffener, aluminum base and both the altitude and azimuth motors and gear heads.
The altitude spacer (cut from the DS-60 fork arm) is visible as well. I'll eventually paint it black.
The altitude gear head had the same problem as the azimuth gear head.
After some sanding, it too rotated freely. I attached the gear head and motor and tested the two axes. They both worked. I then put the ETX OTA
back in its place, tightened the clutches and moved the telescope around with the handheld controller.
Checking my watch, I realized that I had just enough time to walk to the local camera store (a Meade dealer) and buy a 497 Autostar. Later
that night, I connected the Autostar, trained the motors and aligned the telescope. I looked at a couple of stars before the clouds stared to
roll in. As it always happens, it rained for the next three days, but on the first clear night, I got to spend some quality time slewing
around the sky.
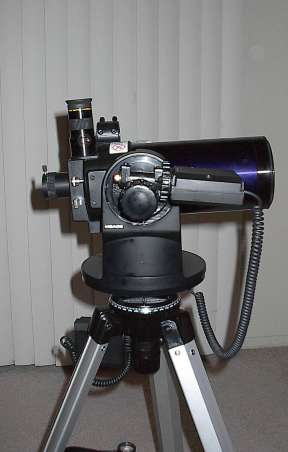
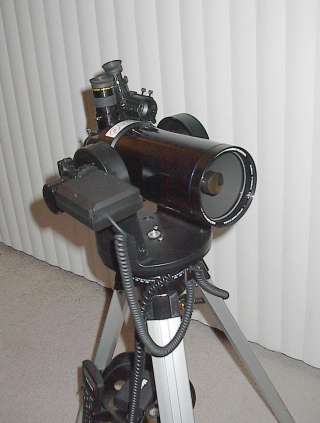
Here are some pictures of the completed telescope: